View Other Users Mac Library
I've had a multi-Mac household pretty much since college, rocking a laptop and desktop in addition to miscellaneous iOS devices throughout the years. Dropbox and iCloud sync made most of the pains of using several Macs disappear, but iPhoto was always a problem. My laptop is tiny! My iPhoto library, not so much.
- View Other Users Mac Library To Mac
- View Other Users Mac Library To Computer
- View Other Users Mac Library To Download
- View Other Users Mac Library Application
Thankfully, Photos for Mac — paired with iCloud Photo Library's Optimize Storage feature — makes working with and syncing multiple Macs a breeze. Here's how you can do it.
How to use Photos and iCloud Photo Library with multiple Macs
Here's a quick, simple breakdown on setting up your Macs to support Photos and iCloud Photo Library.
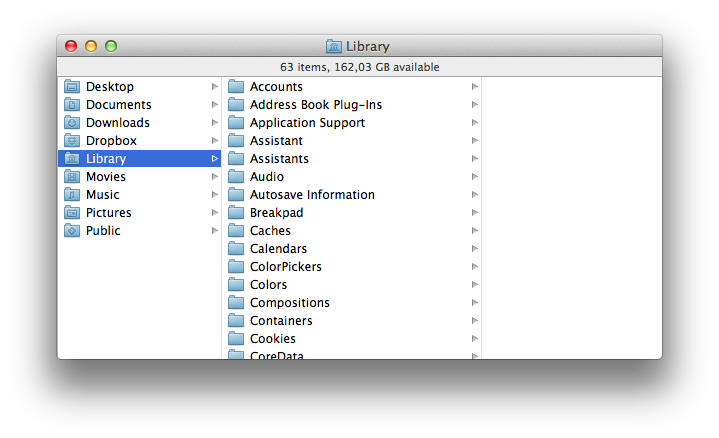
By default, the User Library folder is hidden in Mac OS 10.7 and above. We'll cover a few different methods to easily access this hidden folder. The User Library is home to many 'under the hood' files and folders that correspond to the various Apps and system processes in your computer. Dec 20, 2018 Options to Show User Library. Click on your Users folder, open it in Column view, and select View Show View Options then check the box for Show Library Folder If Library isn’t an option, check that you’re in Column View; Select your User folder, and press Command+ J. Then check the box for Show Library Folder.
Nov 09, 2012 How to Reveal Your Library Folder in Lion or Mountain Lion by Johnny. The Library folder at the root level of your hard drive is a public ‘library’ of data that is required for all users of the Mac. The Library folder within the System folder is critical for the operation of your Mac. Among other things, and is the one that we will. Hold down the Alt (Option) key when using the Go menu. The user Library folder is listed below the current user's home directory. Note: After you open the Library folder, you can drag the Library icon from the top of that window to the Dock, sidebar, or toolbar to make it readily accessible.
I recommend starting with your biggest iPhoto library; it'll usually be on your desktop Mac. When you open Photos for the first time, your library should import automatically; if it prompts you to create a new library, your Photos library may be stored in another location on your Mac, and you may need to manually open it.
Once you've imported your biggest library on your Mac, make sure iCloud Photo Library is turned on and syncing. You can do this by following these steps:
- Launch Photos on your Mac.
- Click Photos in the menu bar.
Select Preferences (or do this quicker by pressing ⌘,).
Source: iMore
Click on the iCloud tab.
Source: iMore
Check off the box for iCloud Photos.
- You can also check off the box for Download Originals to this Mac if you have the space.
- You can check off Optimize Mac Storage to save space on your Mac by only saving a percentage of images and video locally — the rest will be thumbnails that you can click on to download when you want to.
Source: iMore
Now, open your other Mac, and launch Photos. If you have an iPhoto library on that secondary Mac, follow the same steps as above — import your library, then turn on iCloud Photo Library. If you have duplicates of the same photo on each computer, iCloud should automatically resolve those conflicts when it syncs, providing you with just one version of your photos when the sync process finishes.
If you don't have an iPhoto library on your secondary Mac, create a new library in Photos and turn on iCloud Photo Library. If you want to save storage space on this secondary Mac, make sure Optimize Mac Storage is selected: This will save a certain percentage of images and video locally to your device, while providing thumbnails of all the others for you to download at your leisure.
After you've set up all your Macs with Photos and the sync process has finished, you're now good to go. From here on out, any time you add photos, they'll sync to every computer you've set up with Photos.
What syncs, what doesn't sync
Photos for Mac syncs a lot more than just your original photos and videos. According to a support document on Apple.com, here's what else you should expect to see sync:
View Other Users Mac Library To Mac
- All folders and albums
- Smart Albums
- Keywords
- Memories
- Searchable keywords
- Key photo selections
There are a few things iCloud Photo Library won't sync, however. Here's Apple's list:
- Books, cards, calendars, and slideshows
- Keyword shortcuts
- Unused keywords
- Last imported album on the Mac in question
- Names and faces in the People album
For those not using iCloud Photo Library
If you've chosen not to enable iCloud Photo Library, Apple still offers you free syncing of your last 1000 photos via My Photo Stream, which doesn't count toward your iCloud disk space.
This will sync and download images you've imported or taken on other devices, but you won't have the option to optimize your storage or sync your albums.
Octoober 2019: Updated for macOS Catalina.
 Or maybe a developer asked you to delete a preference file, or grab a log file, while troubleshooting a program. Perhaps you wanted to tweak something using a tip from Macworld, or elsewhere on the Web. Inside your home folder is a —commonly written in Unix syntax as /Library, which means “a folder named Library at the root level of your home folder.” This folder is accessible only to you, and it’s used to store your personal settings, application-support files, and, in some cases, data.The files and folders in /Library are generally meant to be left alone, but if you’ve been using OS X for a while, chances are you’ve delved inside.
Serenity Caldwell contributed to an earlier version of this guide.
macOS Catalina
Main
View Other Users Mac Library To Computer
We may earn a commission for purchases using our links. Learn more.
Power upView Other Users Mac Library To Download
Anker's PowerCore Wireless 10K charger is a battery pack without the fuss
Anker is out with a new wireless battery pack that'll keep things ticking along no matter where you are.
Your Photos library holds all your photos, albums, slideshows, and print projects. If your library is large, and you want to free up storage space on your Mac, turn on iCloud Photo Library and use Optimize Mac Storage, or move your library to an external drive.
Before you start, be sure to back up your library.
Prepare your drive
You can store your library on an external storage device, such as a USB or Thunderbolt drive formatted as APFS or Mac OS Extended (Journaled).1 Find out how to check the format of your external storage device.
To prevent data loss, Apple doesn't recommend storing photo libraries on external storage devices like SD cards and USB flash drives, or drives that are shared on a network.
Move your Photos library to an external storage device
- Quit Photos.
- In the Finder, go to the external drive where you want to store your library.
- In another Finder window, find your library. The default location is Users > [username] > Pictures, and it's named Photos Library.
- Drag your library to its new location on the external drive. If you see an error, select your external drive's icon in the Finder, then choose File > Get Info. If the information under Sharing & Permissions isn't visible, click , then make sure the 'Ignore ownership on this volume' checkbox is selected. If it's not selected, click to unlock it, enter an administrator name and password, then select the checkbox.2
- After the move is finished, double-click Photos Library in its new location to open it.
- If you use iCloud Photo Library, designate this library as the System Photo Library.
Delete original library to save space
After you open your library from its new location and make sure that it works as expected, you can delete the library from its original location.
In a Finder window, go back to your Pictures folder (or whichever folder you copied your library from) and move Photos Library to the trash. Then choose Finder > Empty Trash to delete the library and reclaim disk space.
Open another Photos library
If you have multiple libraries, here's how to open a different one:
- Quit Photos.
- Press and hold the Option key while you open Photos.
- Select the library that you want to open, then click Choose Library.
Photos uses this library until you open a different one.
Learn more
If you have a permissions issue with your library, you might be able to resolve the issue by using the Photos library repair tool.
1. You can't move your library to a disk that's used for Time Machine backups.
View Other Users Mac Library Application
2. If the volume isn't formatted APFS or Mac OS Extended (Journaled), or has been used for Time Machine backups but hasn't been erased, this checkbox will either not be present, or won't be selectable after unlocking. Erase and reformat the drive for this option to be available.